Reolink RLC-420 Super HD Security Camera
With a 2560×1440 resolution this Reolink camera is significantly higher than 1080p but is it any good?
I’ve been slowly building my own DIY home CCTV security system after buying a couple of cheap IP cameras. I wanted something with a higher resolution and Reolink seem to be pioneering 1440p cameras in the sub £100 price bracket. Reolink have two styles of IP camera: bullet and dome. Plus they come in two flavours of connectivity: Wireless via WiFi and hard wired Ethernet with PoE (power-over-ethernet).
I bought the dome-style, Ethernet-powered, RLC-420 off Amazon for £64.99 (Amazon Link (affiliate link*)). Take a look at my video for some actual footage or read on for more details.
There are two different ways to use a network security camera:
- Stand alone. The camera handles motion detection, storage of clips and email notifications. If the camera has on-board storage it can be used ‘off-line’ meaning it does not need to be connected to a network unless you require sending email notifications
- Networked surveillance system. A computer on the network runs CCTV software and takes the feeds from multiple network cameras. It handles the recording, motion detection, notification etc.
The Reolink RLC-420 can be set up in either of the above configurations. However, because it does not have on board storage the only option for recording is to send clips to a server using FTP. As long as you have a computer or network storage device which you can send files to with FTP it’s a doddle to set up on the Reolink.
The motion detection in standalone mode is very good. I particularly like the pre-trigger buffer, that means it is continuously recording in a buffer so that when it detects motion the clip will contain a couple of seconds of footage before the motion was detected. This is good for fast moving objects like cars.
Three Way Configuration
You get three different ways to set up the Reolink camera.
- On-board configuration. Using a web browser you can access the very slick built in monitoring and configuration system. Monitoring (live video) requires Adobe Flash so it won’t work Chrome but it’s fine in Microsoft Edge or Internet Explorer. All system settings can be configured without Flash though.
- Android or iOS app. In addition to remote viewing, the app also give you access to all the settings. It’s a little fiddly finding your way around the app to begin with one you work it out it’s a breeze to use.
- Reolink desktop client software. Available on MAC and Windows the desktop software gives you access to live streams and all the camera settings. In addition it allows you to manage multiple Reolink cameras and set up scheduled recording, motion detected recording and a full playback interface. It’s actually a full network surveillance CCTV system, but only works with Reolink cameras.
Picture Quality
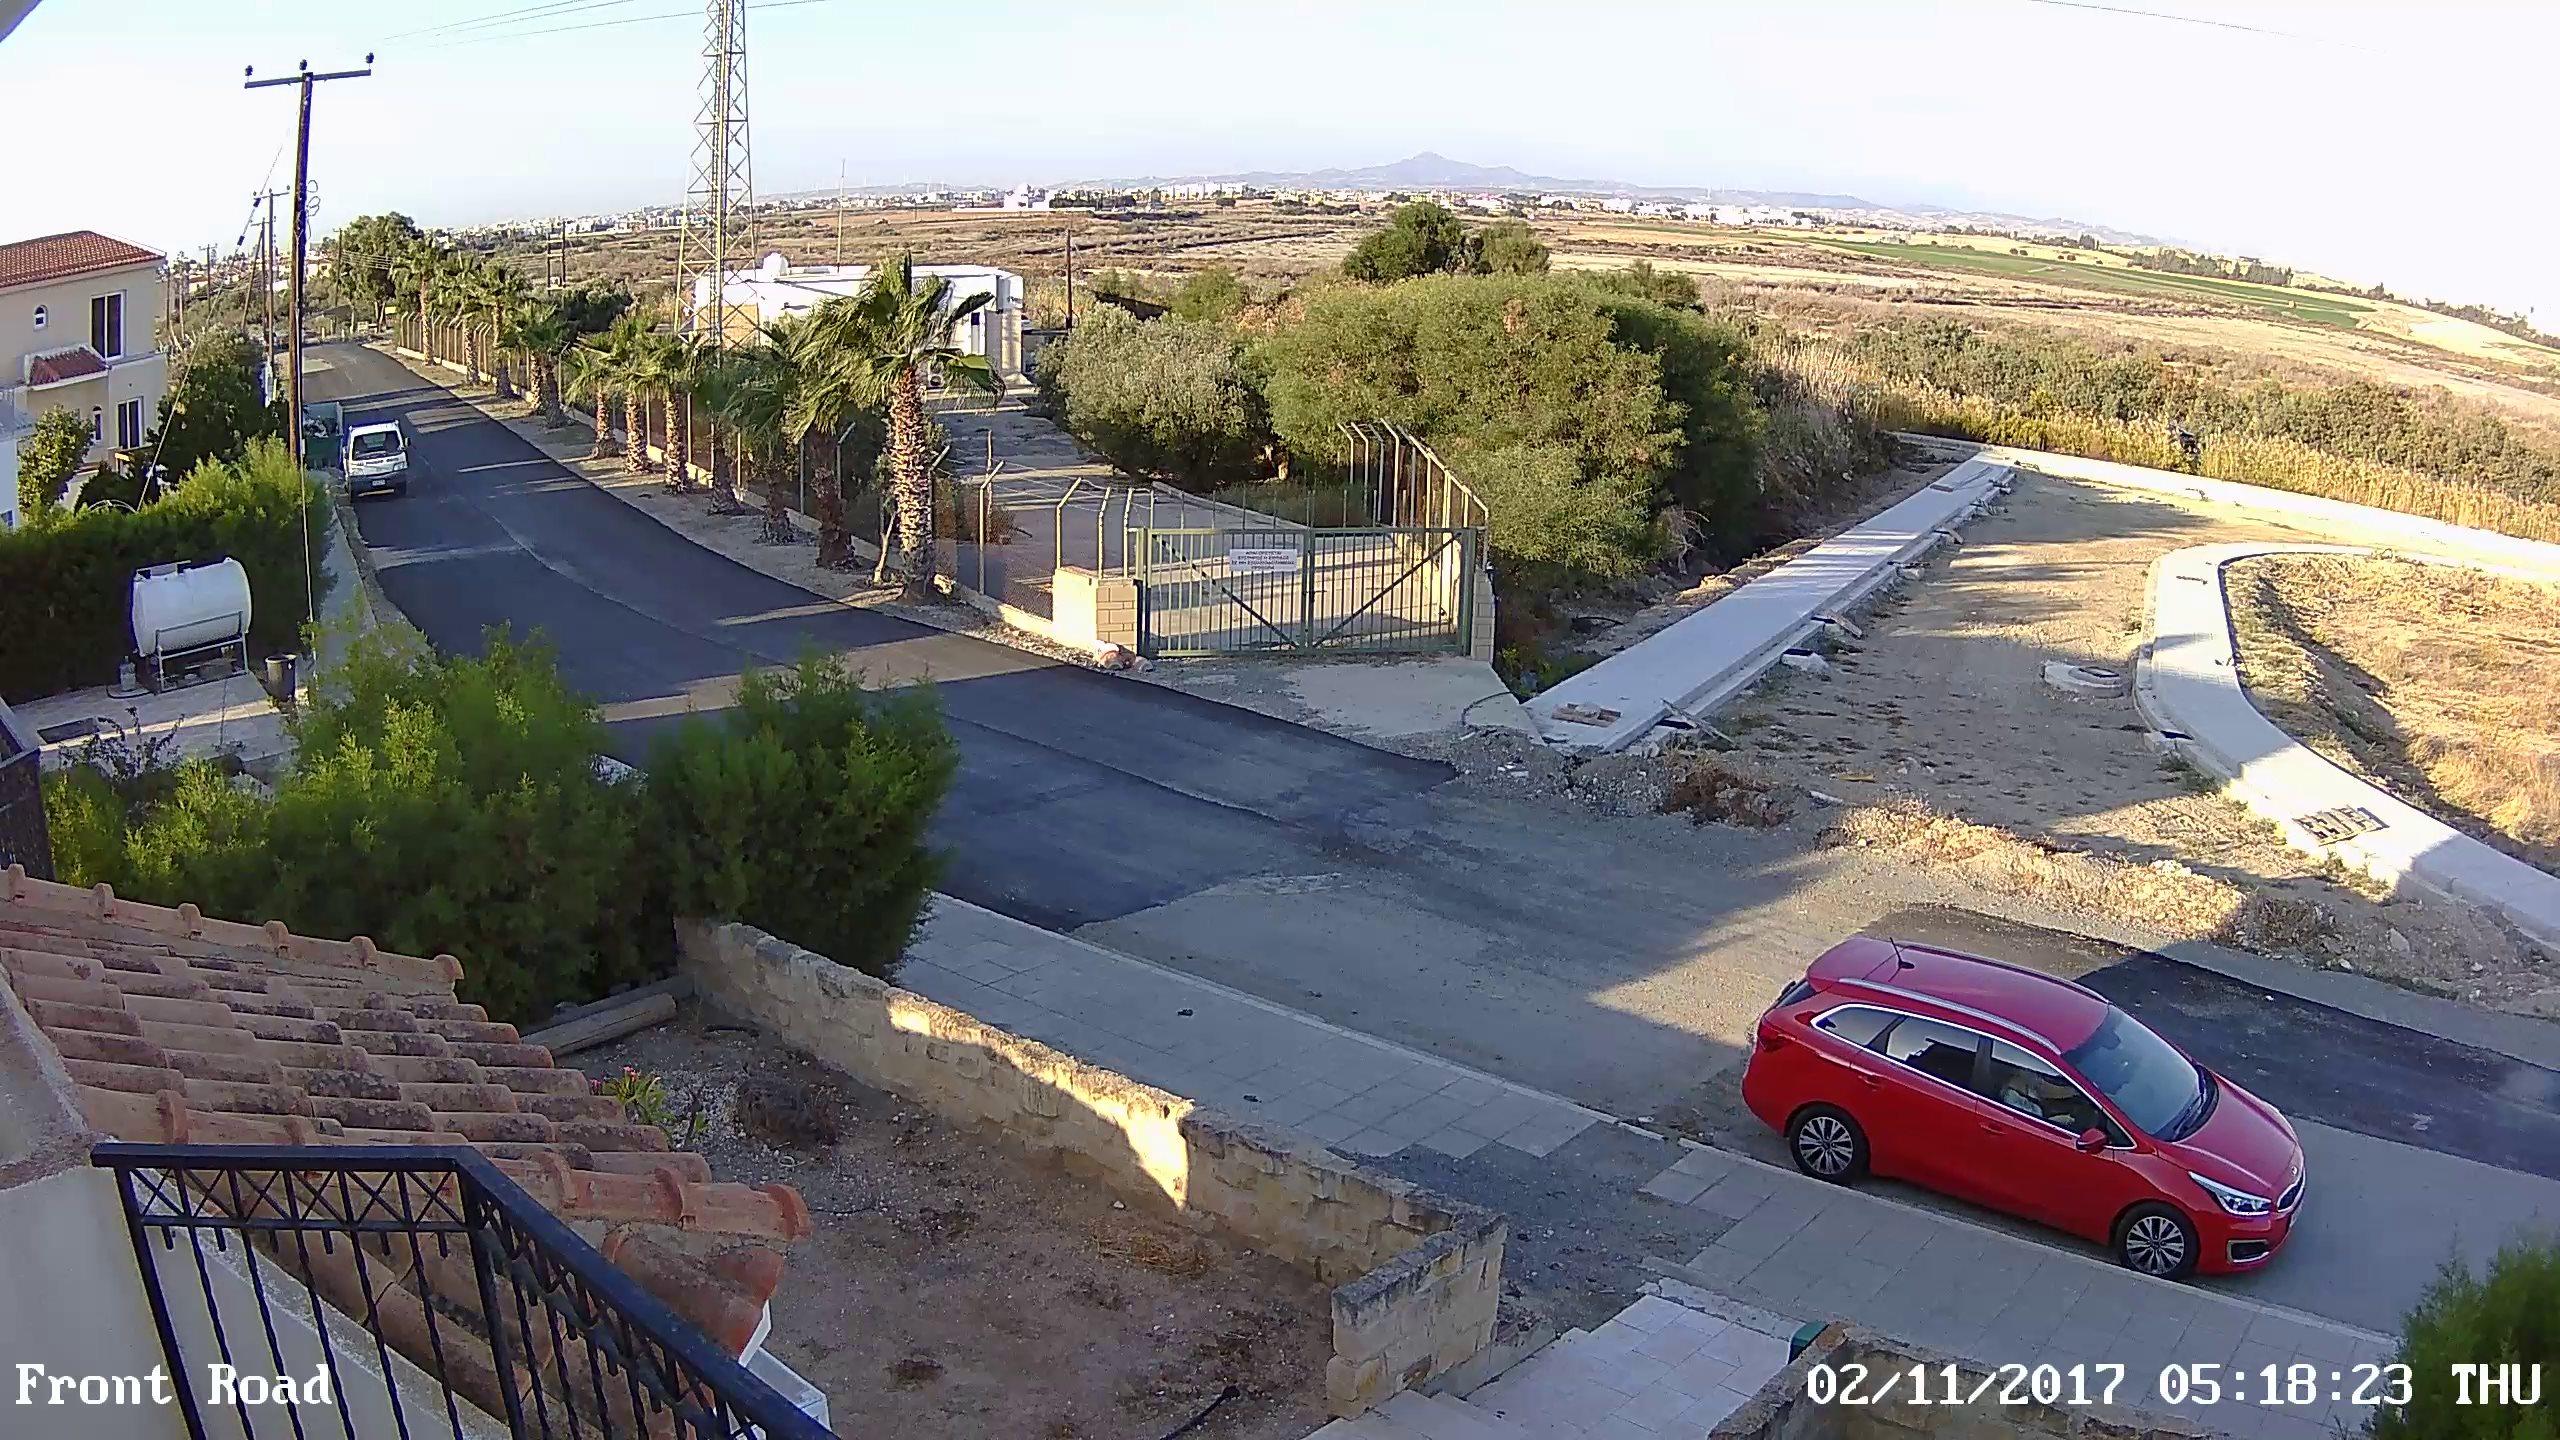
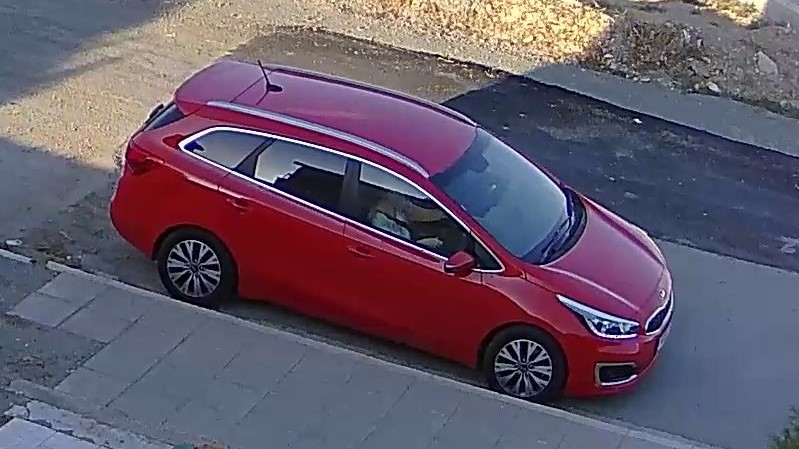
When I first hooked up the RLC-420 my initial impressions were WOW! So much detail when compared to the other 720p and 1080p cameras I have but that’s hardly surprising considering the resolution is almost 40% higher than 1080p. In daylight the colours are vivid and not washed out.
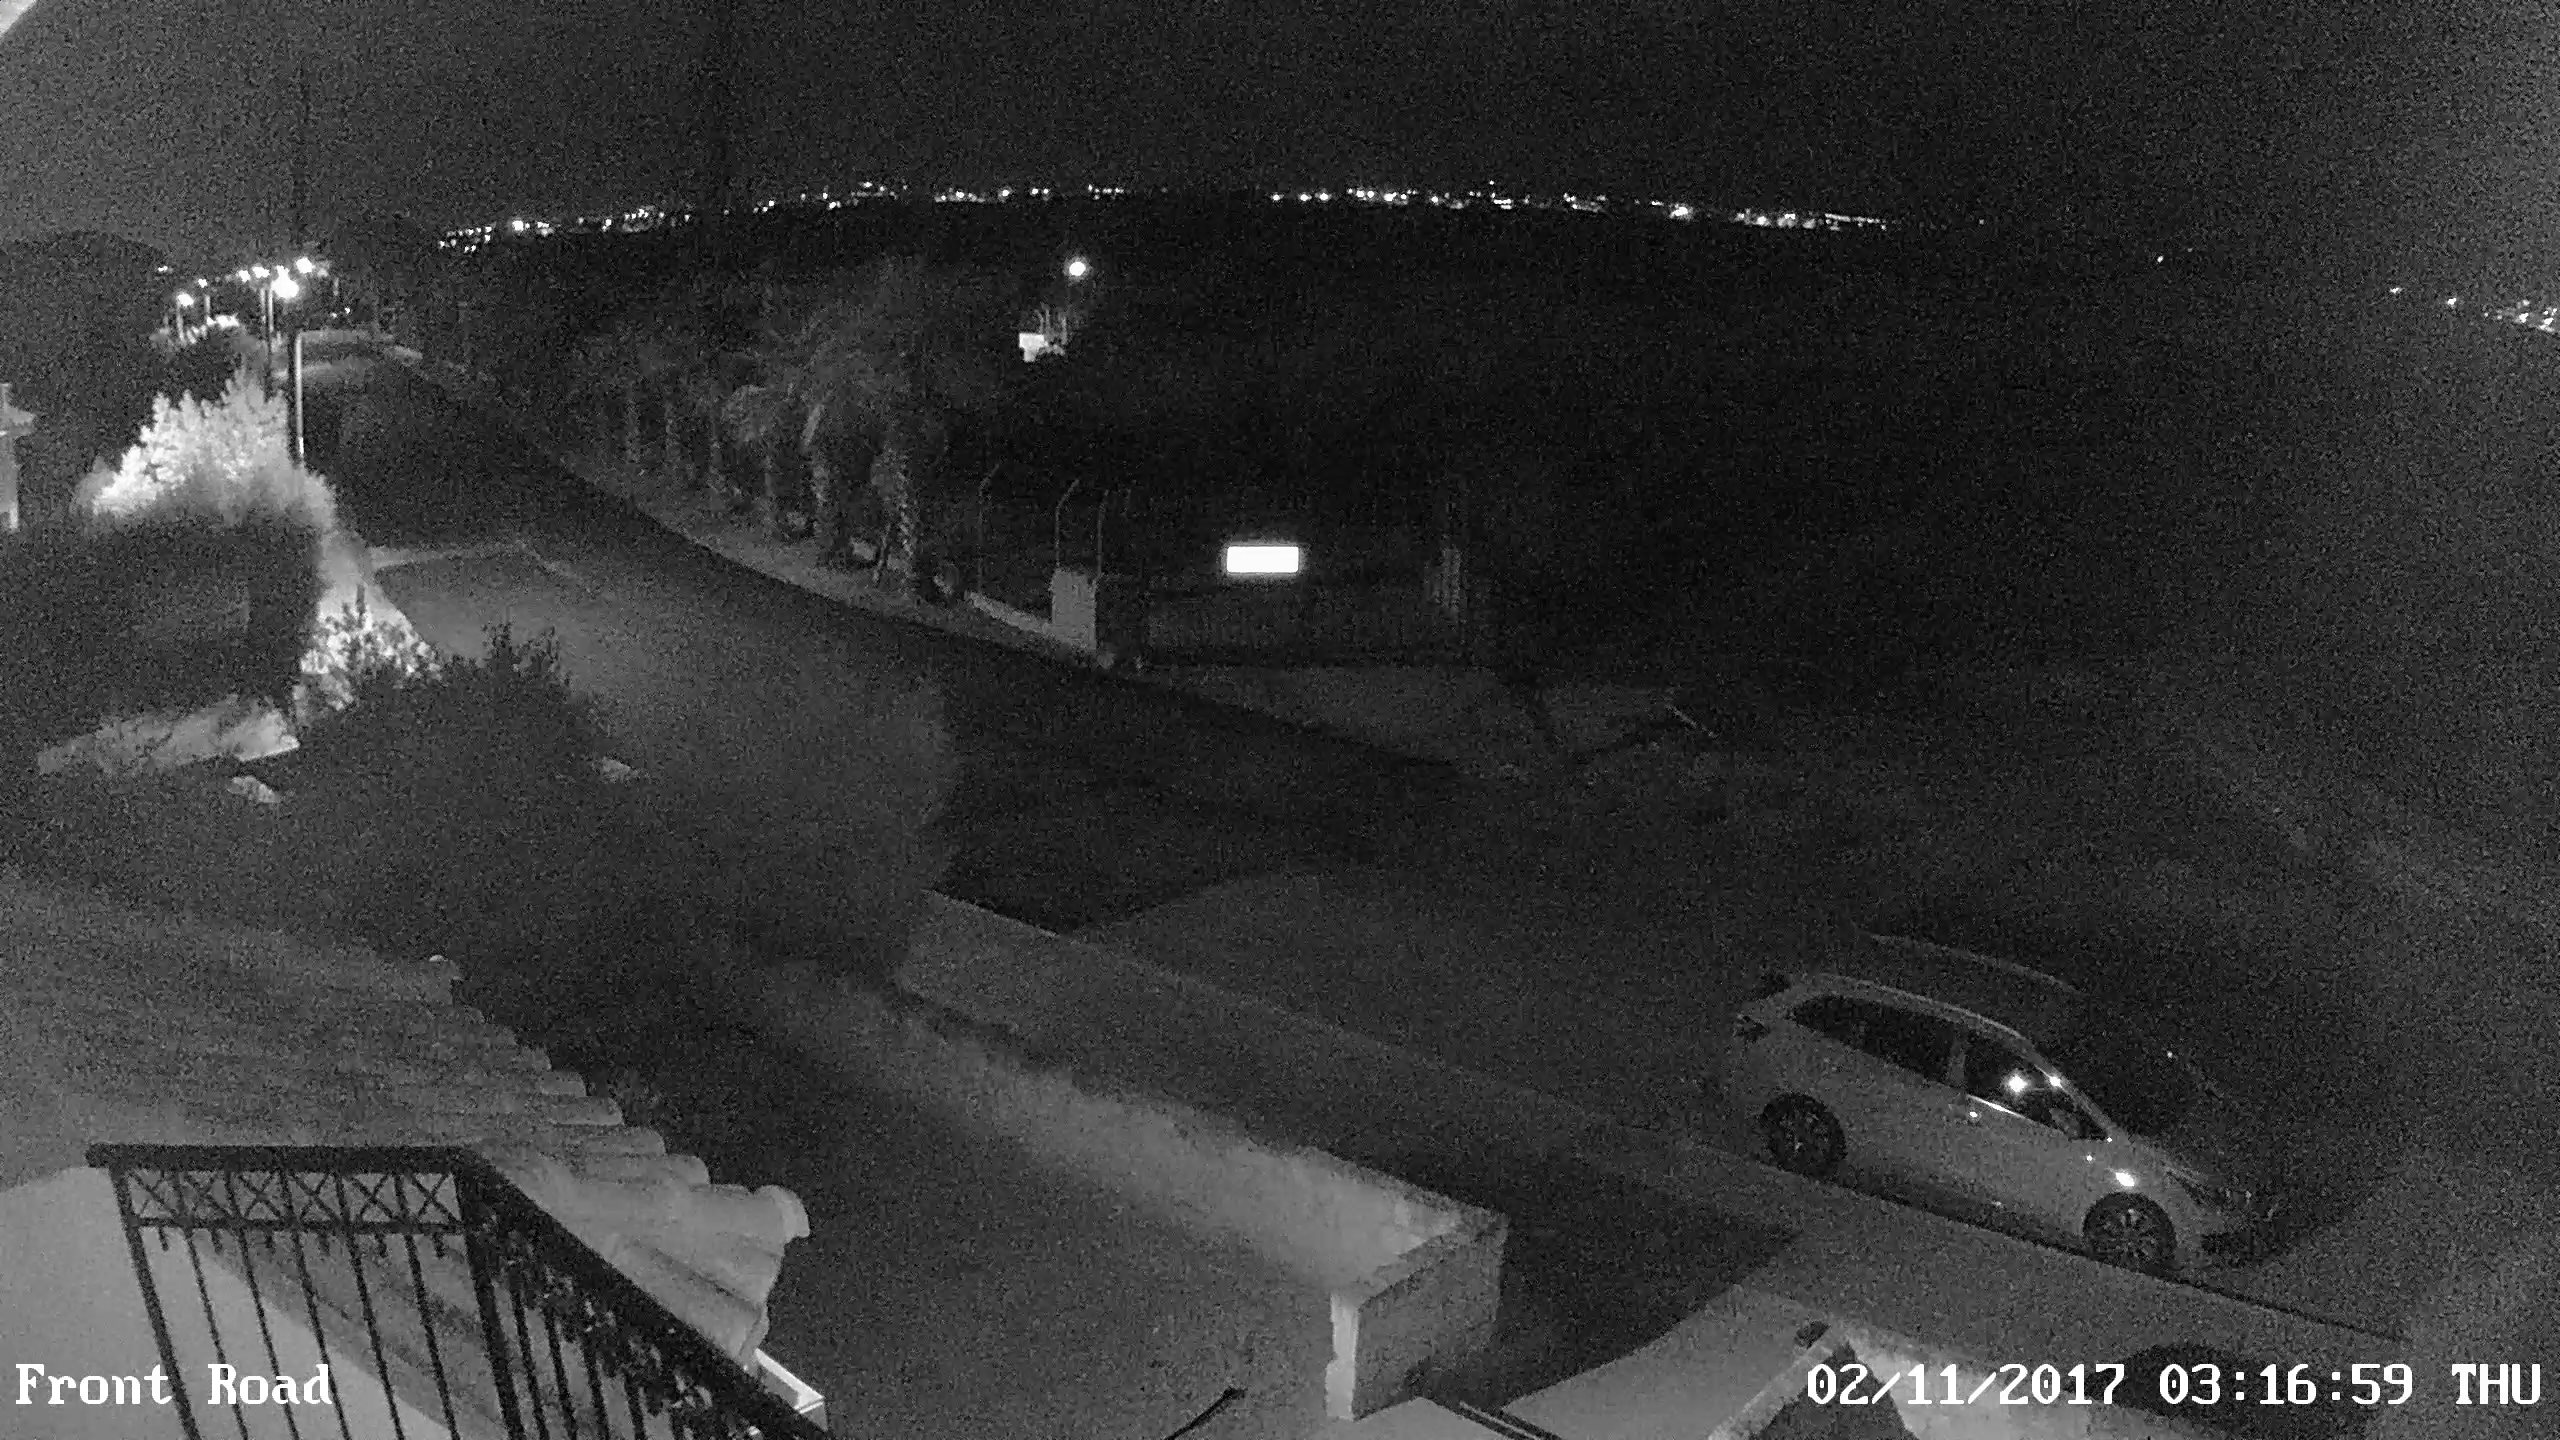
At night the higher resolution doesn’t offer such a great advantage as the image is quite grainy. I guess this is to do with boosting brightness digitally at the cost of image quality. However it is perfectly acceptable as you can see in the following night shots. The second one show a little over exposure when the halogen floodlight comes on.
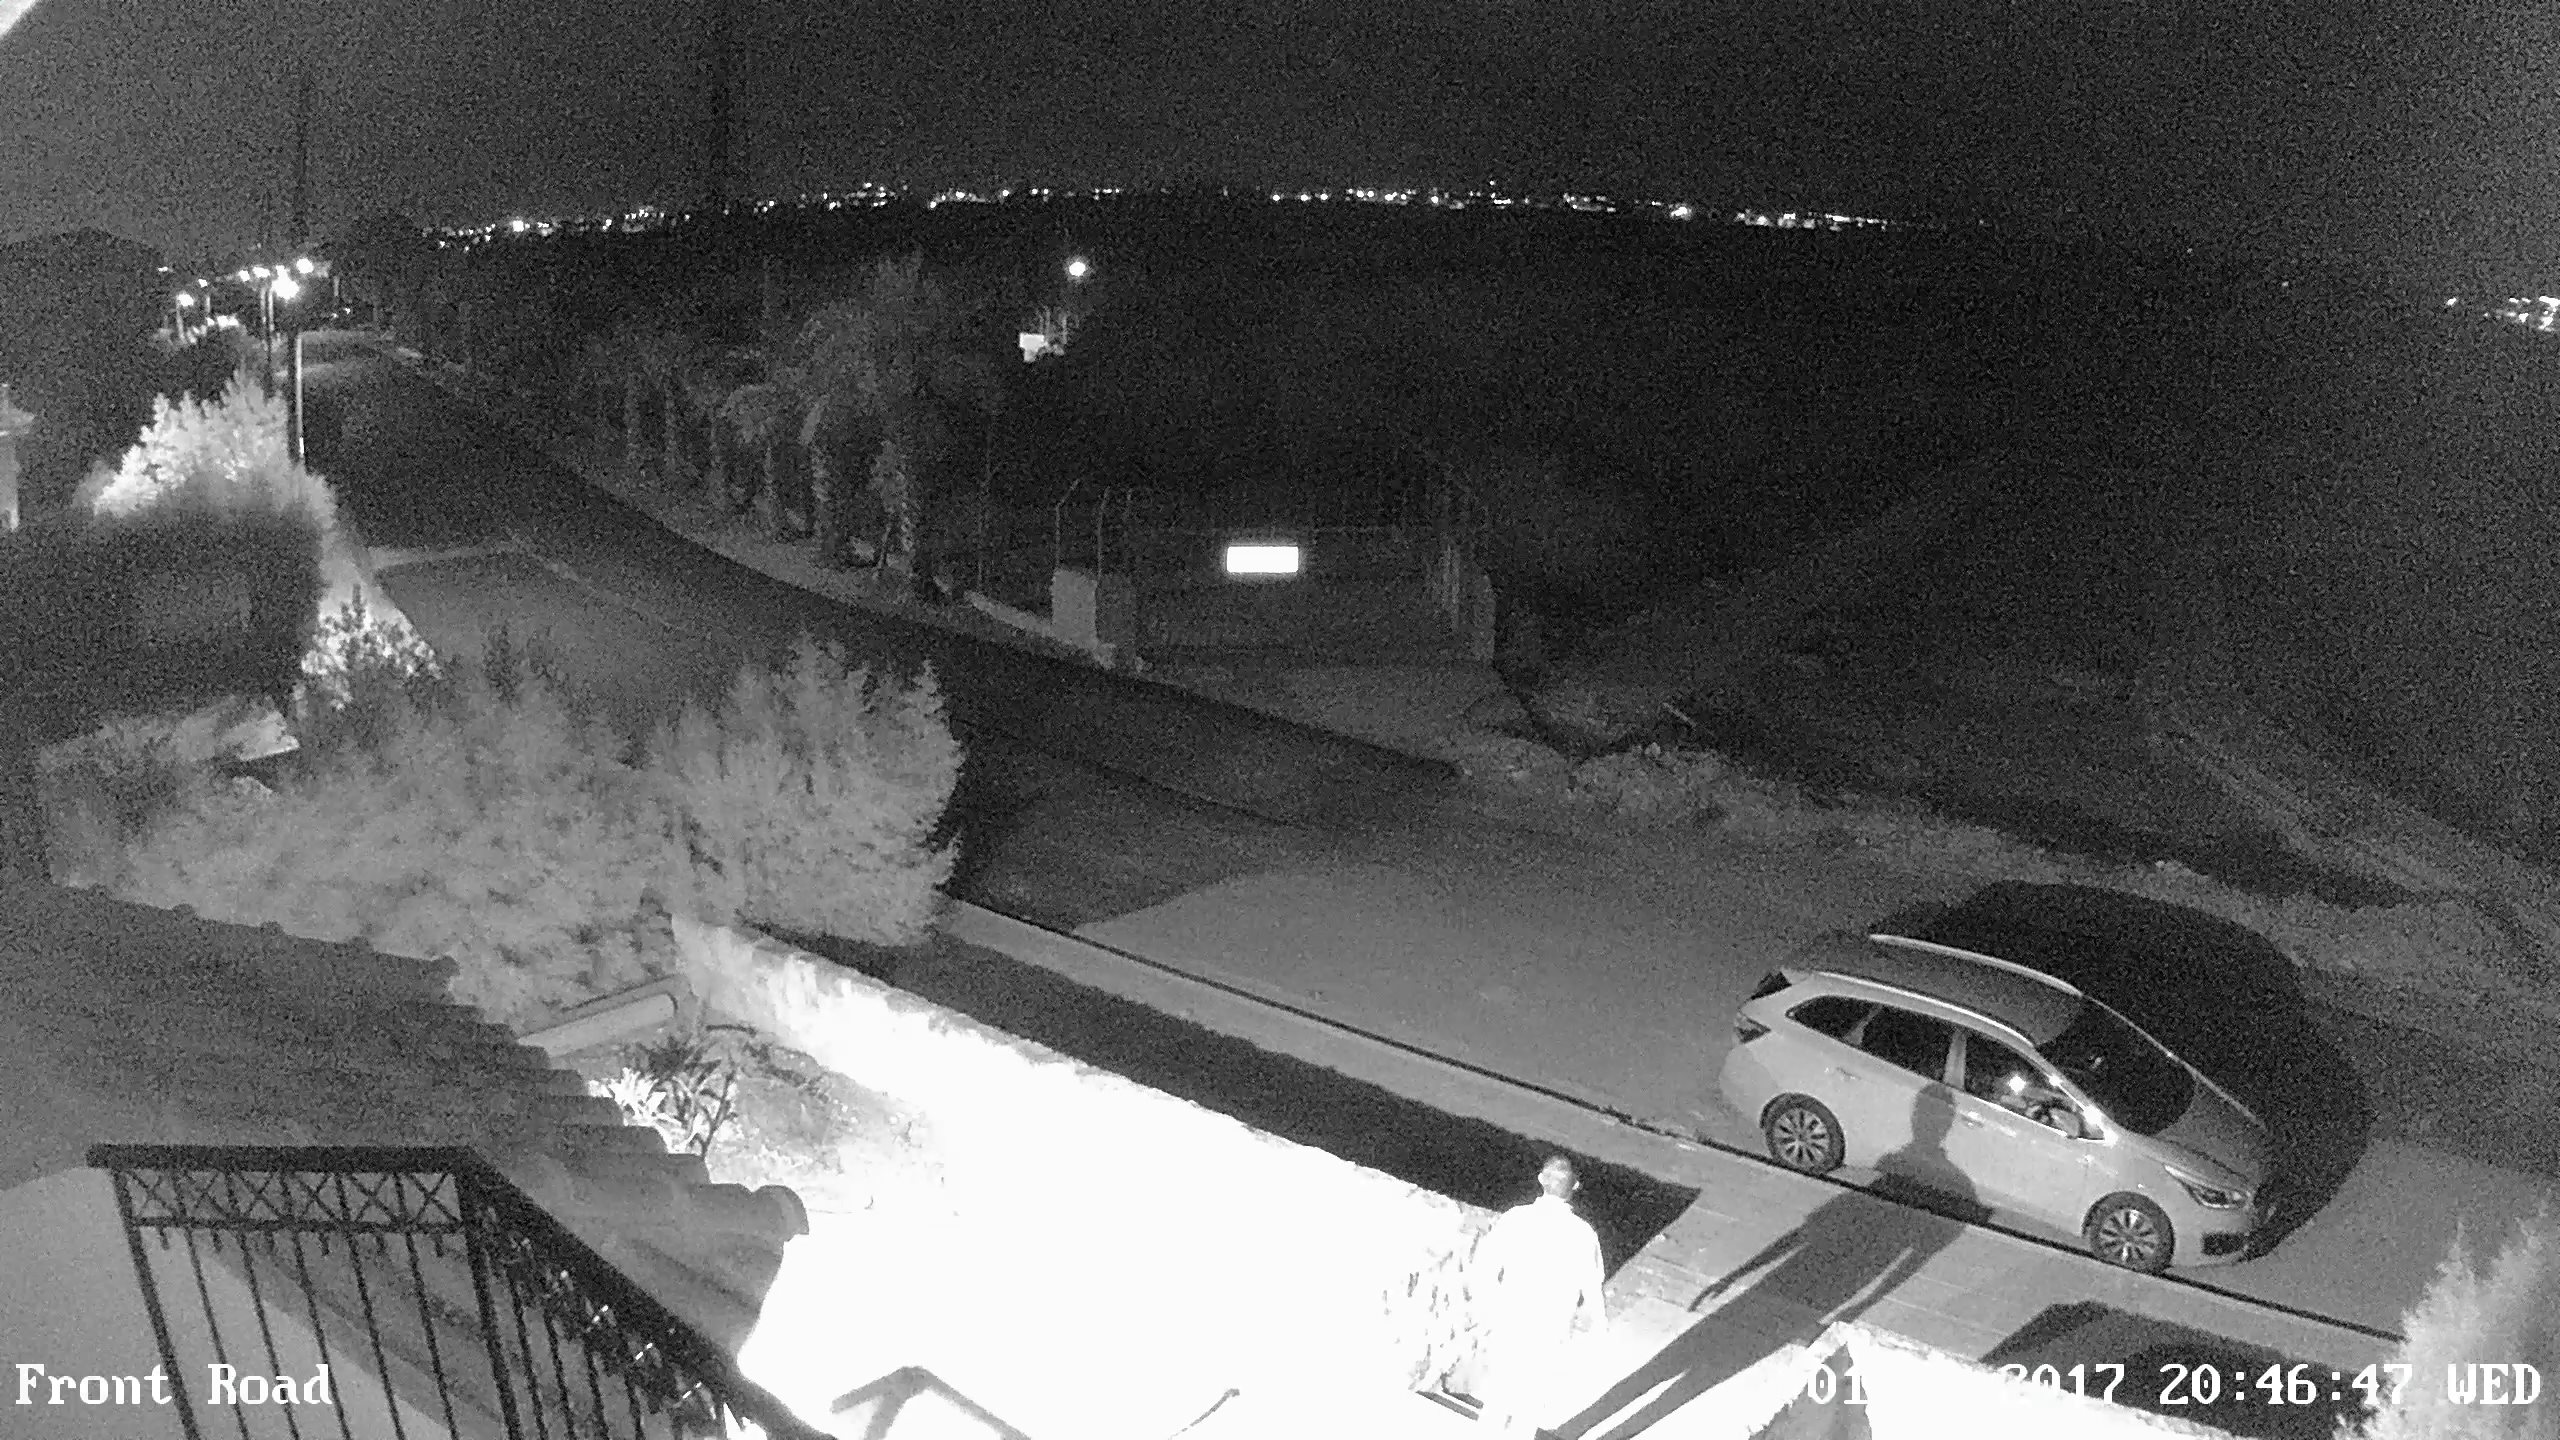
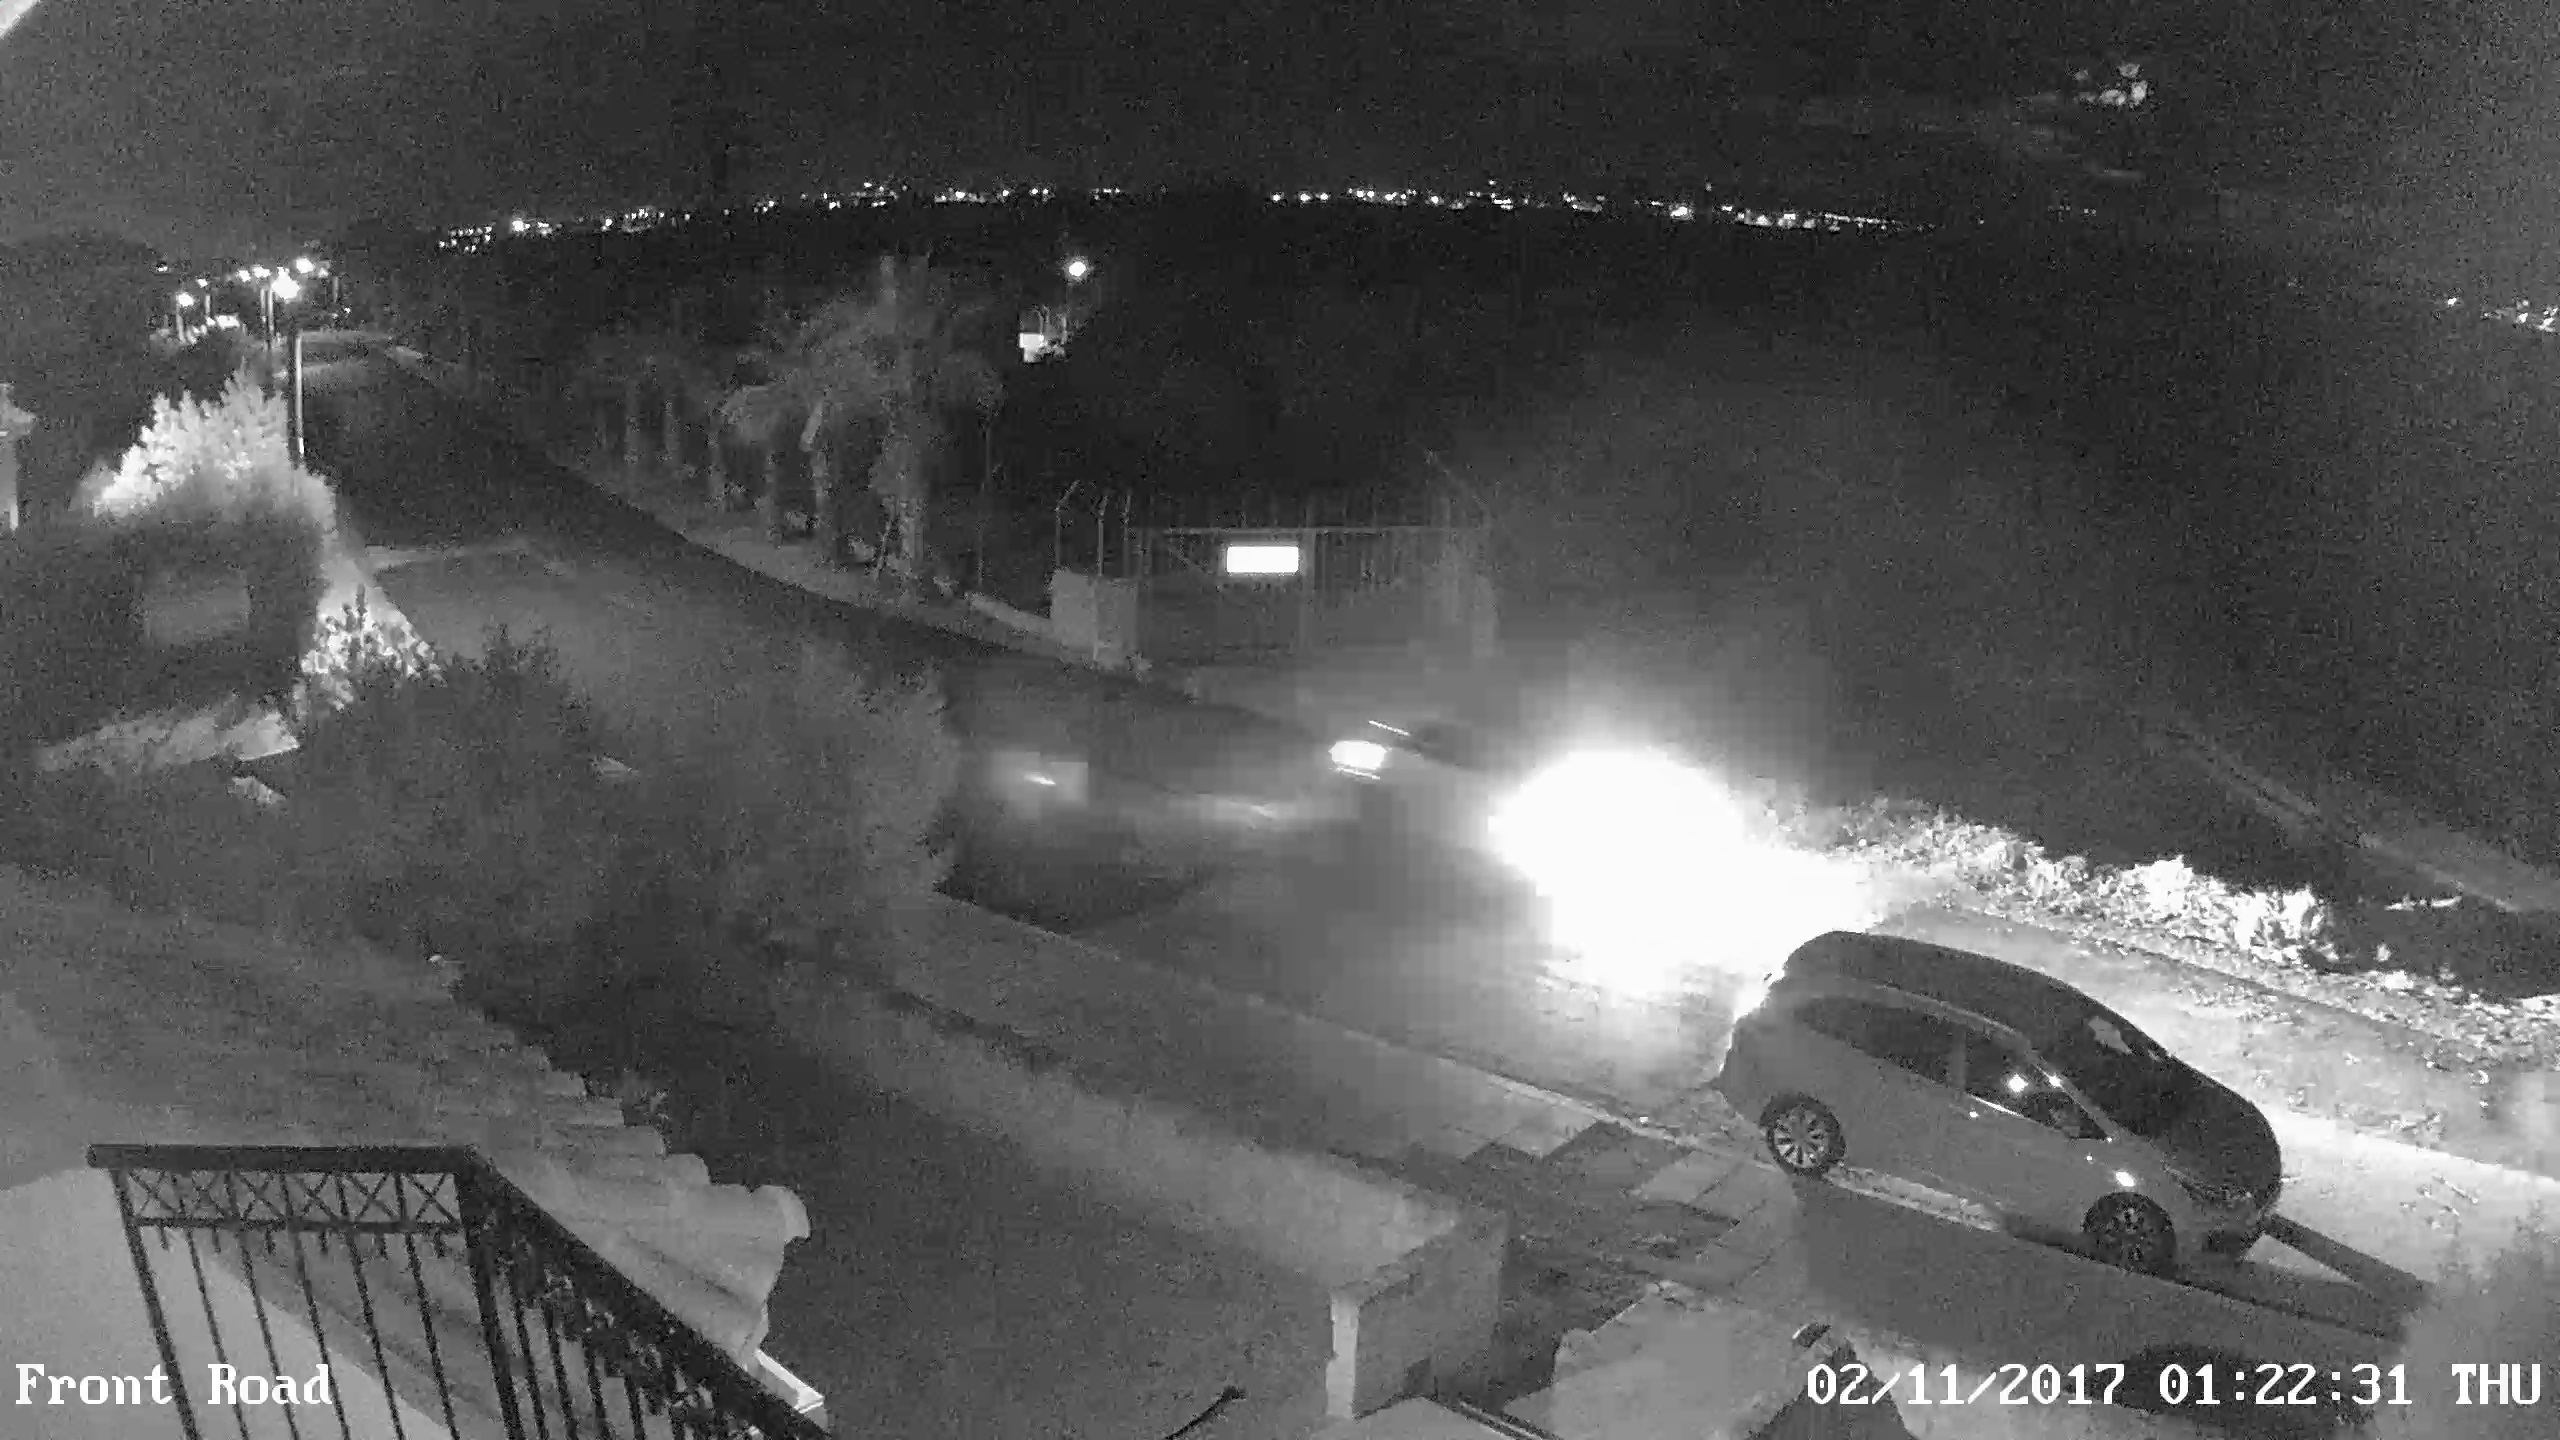
Unfortunately when cars pass at night with their headlights on the brightness pretty much obliterates the detail of vehicle as can be seen in the third image. I guess for under £100 you can’t expect perfect night vision. When combined with a separate and more powerful IR floodlight illuminator (affiliate link*) (which I’m hoping to order soon) I expect the night vision performance will be greatly improved. Watch this space!
Third Party CCTV Software
There are lots of network surveillance systems out there. Some are free while others are way too expensive for a small home security setup. I chose Blue Iris as it is one of the more popular ones and it’s not very expensive – approx. £50 for a multi-camera licence. It’s been around for a long time and has a healthy community of followers. Reolink provide a guide on setting up their cameras with Blue Iris here but it is pretty straightforward if you are already familiar with using Blue Iris.
-

- Blue Iris Reolink playback

-
- Reolink settings in Blue Iris
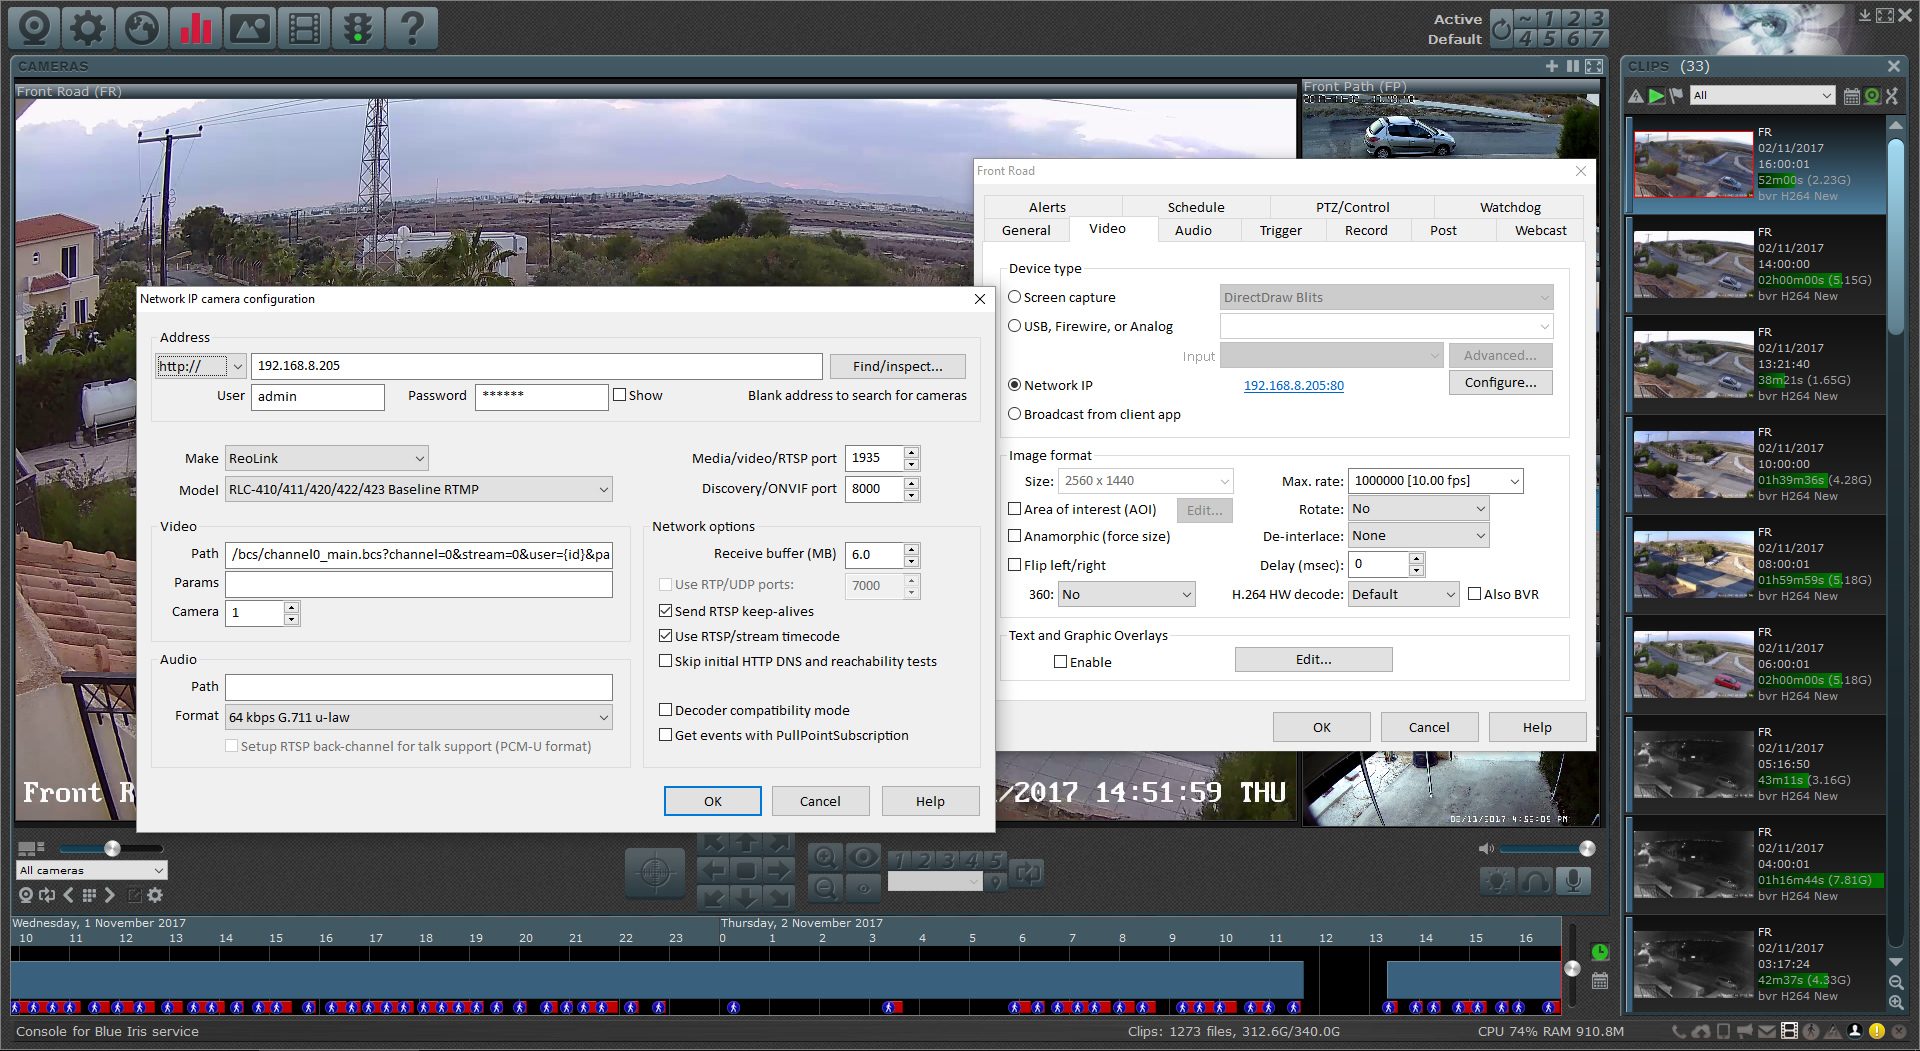
When using CCTV surveillance software it’s a good idea to set the FPS (frames per second) for storing video to 10 or less. If you leave it at the default 25 FPS the video files are going to be huge especially at 2560×1440 resolution! You should do this in both the camera’s settings and the CCTV software that way the camera is not using unnecessary bandwidth on your network and the PC running the CCTV software doesn’t get overwhelmed!
Power Supply
This is my first device I’ve ever owned which can get it’s power from the Ethernet cable. In order for Power-over-Ethernet (PoE) to work you need to get the power into the ethernet cable. One option is to connect the camera to your network via router or switch with powered ethernet (PoE) ports. Another option, which is also useful when combined with PowerLine adapters, is a small PoE adaptor/injector (affiliate link*). That’s what I did for my installation as the camera is located on the wall of a bedroom where there is no network cabling, see the photo below:
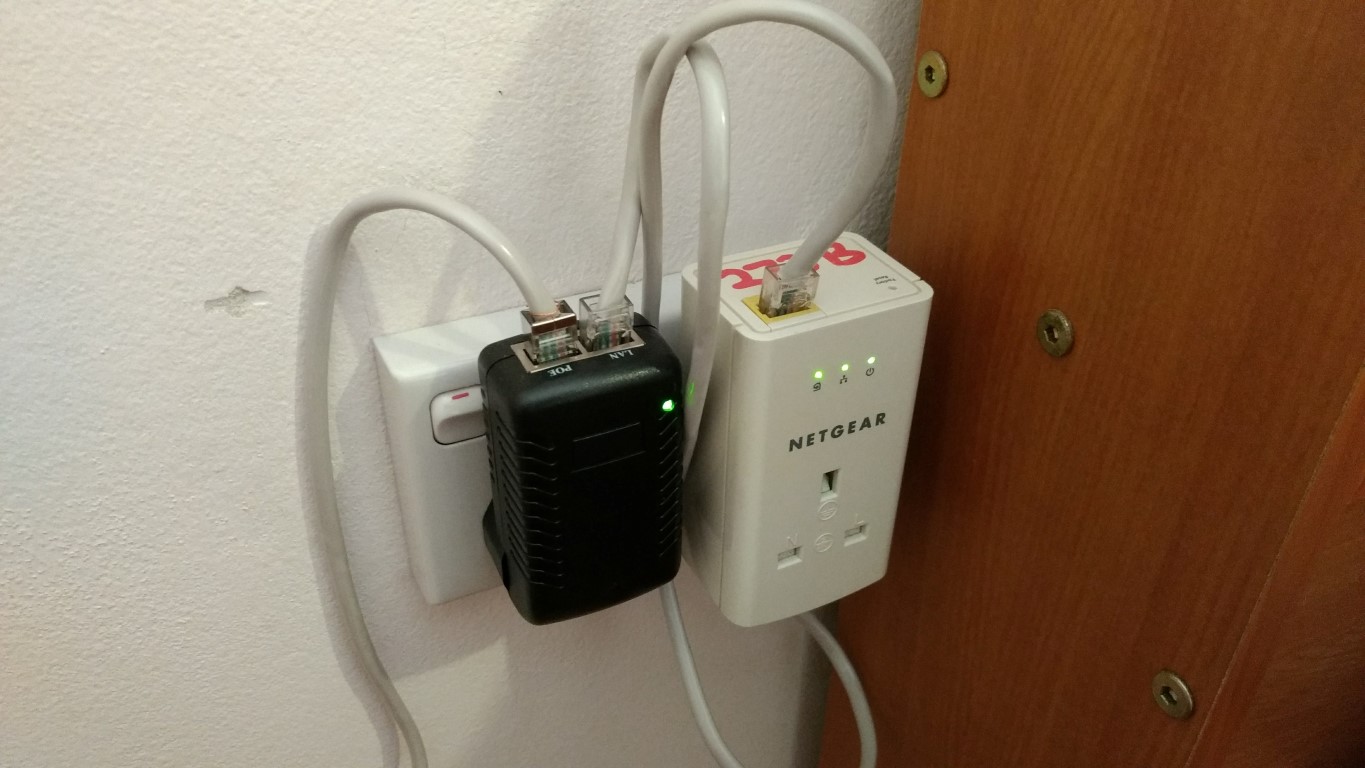
Powerline adapter -> PoE adapter -> camera
The main router in my home is connected to a Powerline adapter so the Reolink camera is accessible on my network connected to this Powerline adapter. Using the PoE adapter I only have to run an Ethernet cable to the camera. The PoE adapter only cost £6.55 (Amazon link (affiliate link*)) and it’s been working perfectly with the Reolink camera since I installed it.
Another power option is not to use PoE at all. You can use the supplied power supply to connect to the power connector on the camera – you can see this connector in the video.
Reolink RLC-420 Summary
Pros
- Excellent software for setup and configuration
- Higher resolution than standard 1080p HD
- Incredible daytime image quality
- Works great with Blue Iris (NVR/CCTV surveillance management software)
Cons
- Stand-alone functionality limited due to lack of on-board storage (SD Card)
- Night vision image noisy
Where to Buy
- Amazon (affiliate link*)
- Reolink Direct (worldwide shipping)
If you’ve got any questions about the Reolink camera or using it with Blue Iris feel free to ask below.


Hello,
Can the rlc 420 dome be installed on wall instead of ceiling or will the video be shown sideways rotated?
Thanks
No problem mounting on the wall, that’s how mine was mounted in the photos and video here. When you take the housing off you can adjust the direction the camera points and the rotation of the lens.
RE: Another power option is not to use PoE at all. You can use the supplied power supply to connect to the power connector on the camera – you can see this connector in the video.
My RLC-420 didn’t come with a power adapter. What voltage and current is required? I see it’s marked POSITIVE tip and NEGATIVE ring.
Thanks!
the PSU mine came with says 12V 1000ma (1 amp)
Hi Mark. A very interesting review. As a user of this camera I can confirm that my experience has been mostly positive. I am struggling a lot with the motion detection. I simply cannot get the camera to ignore movement outside the detection zone that I have set up on by front door. For example I am constantly getting false triggers as a result of reflections in the glass next to my door or movement of my neighbours car on the drive way. Do you have any experience of the movement detection which may assist me in getting rid of the false triggering?
Hi Mark. I had issues with motion detection at night time because of insects flying around the IR lights along with general added noise you get in a nighttime shot so I adjusted the sensitivity down for night time periods. Also I am always very conservative with the motion detection area settings. I take into consideration not just bushes that might move in the wind but also the shadows of the bushes. I don’t have any reflections to deal with but you should avoid areas where that might be a problem. Here’s a link to a screengrab showing my motion detection area: https://www.improdia.com/wp-content/uploads/2018/04/reolink-rlc-420-motion-detection-area.jpg
Hi, great review and very useful to see your junction box setup in the video. I’m struggling to find a suitable gland/seal for the cable hole on the junction box. Did you buy the black rubber circles separately to the junction box? Have been searching Amazon but not managed to find one suitable.
Hi Ben, glad you liked the review. I bought the box and the grommets from an over-the-counter electrical outlet here in Cyprus – a sort of trade center which is also open to the public. The box did not have the holes or have push outs for the holes so I just used a 20mm hole drilling bit which is actually designed for wood bu cuts the plastic quite easily.
The main thing with the grommets is they have to be big enough so the hole they go in is big enough for the ethernet connector on the end of the camera cable to fit through but have no pre-cut hole in them so you can make your own hole in the middle with a cut to the edge if you see what I mean.
I found these on Amazon UK which are the kind that I used: amzn.to/2uwWvtr
Many thanks Mark. I didn’t know the black disks were called grommets, with that knowledge I was able to buy some over the weekend and get the junction box and camera installed. Drilling a hole in the grommet then cutting from the hole to the edge was a good method too, thanks. Wish these cameras just had 1 slim PoE cable! Other than that they’re great though.
Hi Ben, what junction box did you go for, and was it IP66 rated? Found one at Toolstation but I think it will be very small.
I bought mine from a local hardware shop here in Cyprus. It was IP68 I think. Doesn’t need to be that big. I’ve used 80cm diameter round ones for other cameras.
EDIT: Just realised you were asking ben! I’ll leave this here anyways!